Iconic chassis... but weakened by time and modern constraints
Generations of BMWs E30, E36, E46, as well as Z3 and Z4 E85, are now recognized as benchmarks in the field of driving pleasure. Their chassis balance, rear-wheel drive architecture and steering precision explain their enduring popularity.
However, one point is often underestimated:
👉 these cars are now 20 to 35 years old, The chassis was neither designed nor dimensioned to cope with modern constraints indefinitely.
With time, metal tires, the welds age, and certain structural zones become particularly vulnerable.
1. Age: a key factor too often ignored
Even on a car with low mileage, several phenomena come into play:
- sheet metal fatigue due to repeated load cycles
- internal corrosion sometimes invisible
- lower structural rigidity
- hardening or collapse of elastic elements (rubber)
👉 A BMW E46 chassis in 2025 no longer reacts as it did in 2000, even with impeccable mechanical maintenance.
2. Really fragile structural zones (front and rear)
🔴 Rear shock absorber towers (E30 / E36 / E46 / Z3 / Z4)
This is the most documented weakness.
Rear shock absorber towers :
- vertical impacts (degraded roads),
- lateral constraints,
- the increased effort of sport suspension.
Over time, we observe :
- progressive deformation of the sheet metal,
- cracks around fixing points,
- in extreme cases, partial removal of support.
👉 A cracked rear tower is a serious problem, because it affects :
- rear axle geometry,
- handling,
- high-speed safety.
Repairs can quickly exceed 2 000 à 5 000 €, depending on the extent of the damage (welding, straightening, reinforcement, painting).
🔴 Front shock towers (often forgotten)
Less talked about, but front laps are also subject to severe constraints, especially when :
- the springs are shorter,
- the shock absorbers are firmer,
- the car is driven sportily.
On the road, a grab bar can already :
- limit bending,
- distribute the effort between the two towers.
👉 However, it does not strengthen the sheet itself.
There are also front tower reinforcement plates, which play the same structural role as at the rear.
3. Sport suspensions: a risk often underestimated
Change original springs and shock absorbers for a shorter, firmer setup mechanically increases stress on the chassis :
- less travel = more direct impact
- firmer shock absorbers = increased force transmission
- threaded combinations = stresses concentrated on areas not originally reinforced
👉 It's not not the suspension that breaks the frame, but the failure to adapt the chassis to this new constraint.
This is a crucial point that many owners discover... too late.
4. Rear shock absorber mounts: roadholding ≠ chassis strength
It is important to distinguish between two different functions :
🔧 Reinforced rear shock absorber mounts
They are used to :
- reduce parasitic movements,
- improve rear-end precision,
- keep the shock absorber correctly aligned,
- improve handling, especially with a stiffer setup.
👉 Their role is not to reinforce the shock tower sheet metal.
They improve dynamic behavior, not the structural strength of the body.
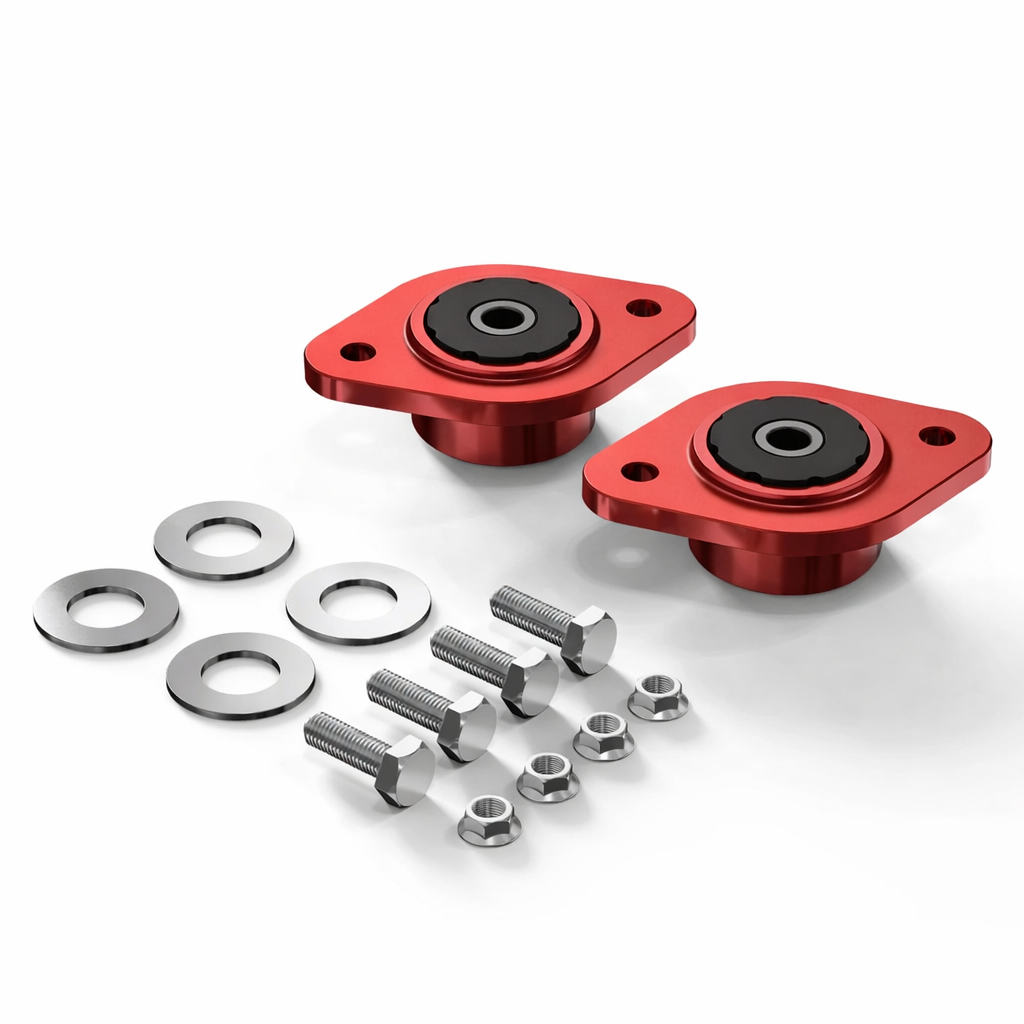
🛡️ Rear shock absorber tower reinforcement plates
They are used to :
- spread loads over a larger area,
- limit sheet metal deformation,
- prevent cracking and tearing,
- long-term protection of the chassis.
👉 These are what really strengthen the structure.
The two solutions are complementary, but do not fulfil not the same role.
5. Other existing solutions
🔨 Welding and welded reinforcements
- effective if well executed
- costly
- irreversible
- requires complete disassembly and painting
👉 Rather reserved for cars already damaged or with intensive track use.
🔩 Bolted reinforcements (plates)
- preventive solution
- reversible
- controlled cost
- sufficient for road and sports use
6. Installation guide
Reinforced rear shock absorber mounts and reinforcement plates
BMW E30 / E36 / E46 / Z3 / Z4
⚠️ Important before you start
This guide covers :
- the replacement of rear shock absorber mounts
- and/or the installation of rear shock tower reinforcement plates
It is strongly recommended to :
- work on a flat surface
- use candles or bridge
- observe the manufacturer's tightening torques
- replace worn parts (silentblocs, thrust blocks, worn screws)
🧰 Tools required
- Hydraulic jack and jackstands
- Ratchet wrench + sockets (16 mm, 18 mm depending on model)
- 6 mm Allen key
- Flat screwdriver
- Nose pliers
- Grease suitable for polyurethane
- Torque wrench (recommended)
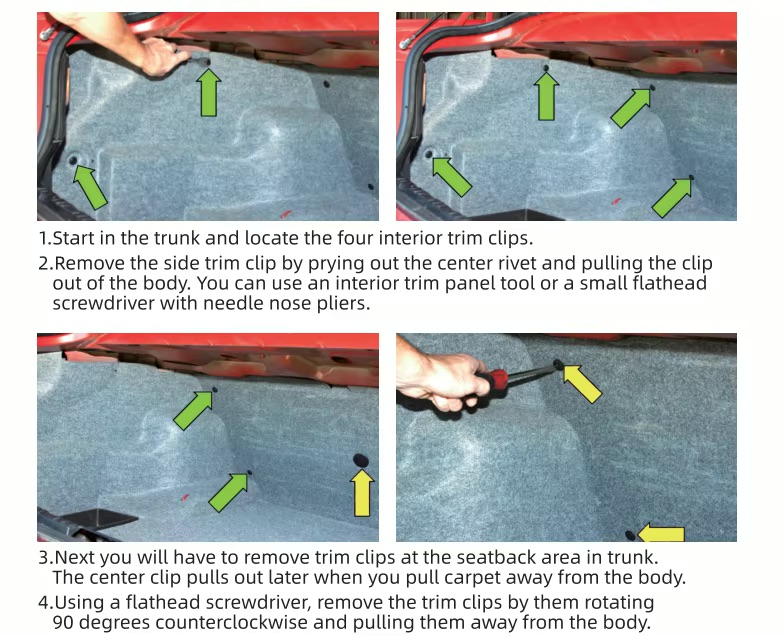
🔹 STEP 1: Access to rear shock towers (trunk)
- Open the trunk and locate side trim clips.
- Remove inner clips :
- remove the central rivet,
- then remove the complete clip.
- Gently peel back the side carpet from the trunk.
- Remove the clips on the backrest side.
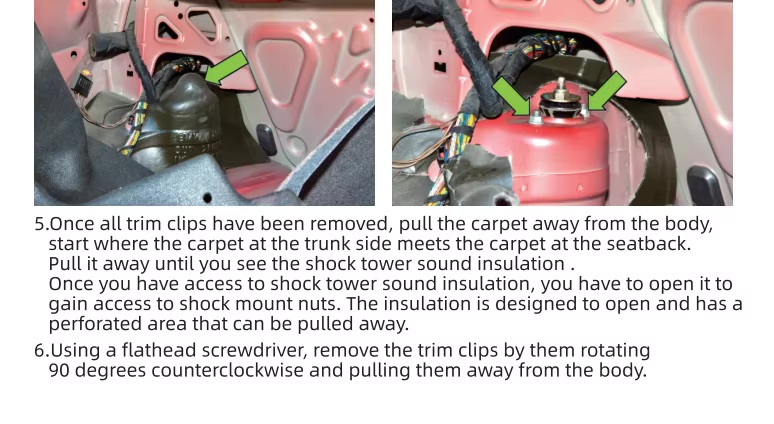
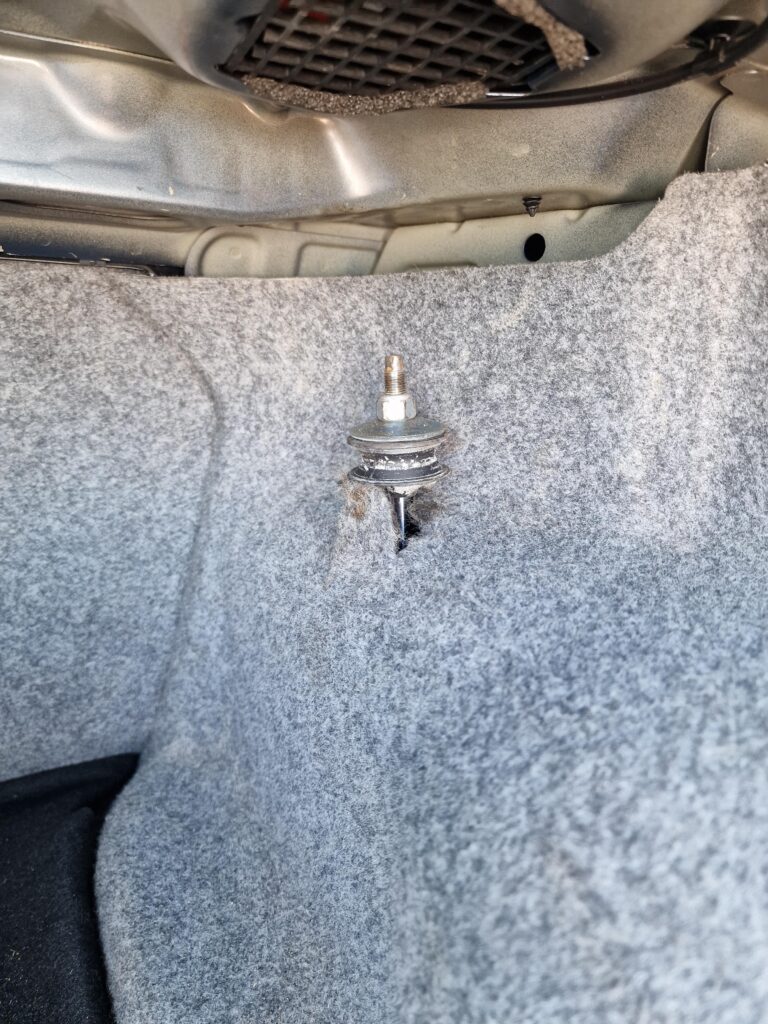
- Pull carpet up to discover the shock tower sound insulator.
- The insulation is pre-cut: open it to gain access to the upper shock absorber support nuts.
👉 At this point, visually inspect the sheet metal :
- cracks,
- deformations,
- cracked paint.
Any faults must be rectified before reassembly.
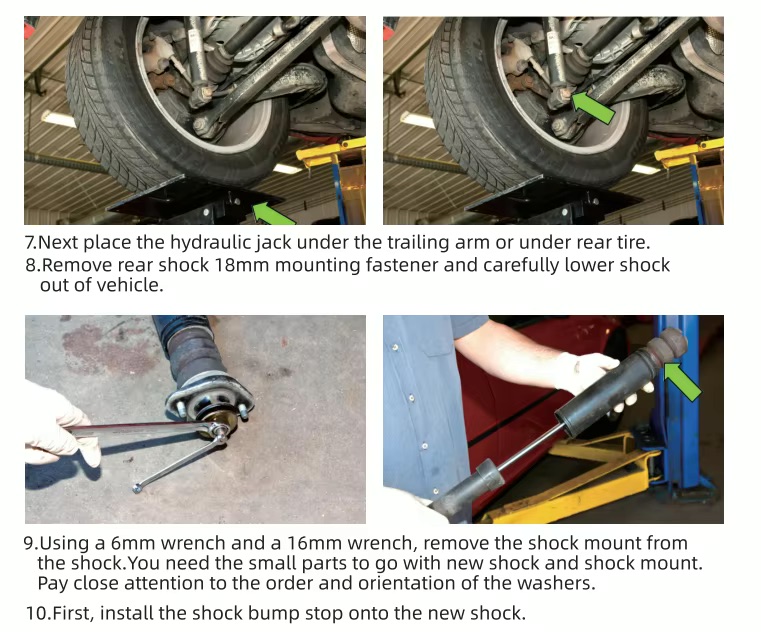
🔹 STEP 2: Shock absorber stressing and removal
- Position a jack under the rear suspension arm or wheel.
- Loosen and remove the lower shock absorber screw (usually 18 mm).
- Slowly lower the arm to release shock absorber.
- Remove the shock absorber from the vehicle.
⚠️ Never let the arm fall suddenly: risk to silentblocks and hoses.
🔹 STEP 3: Shock absorber bracket removal
- Hold the shock absorber rod with an Allen key (6 mm).
- Unscrew the top nut using a 16 mm open-end wrench.
- Remove :
- the old support,
- washers,
- stop and bellows.
📌 Identify the order and direction of washers, Some are curved and directional.
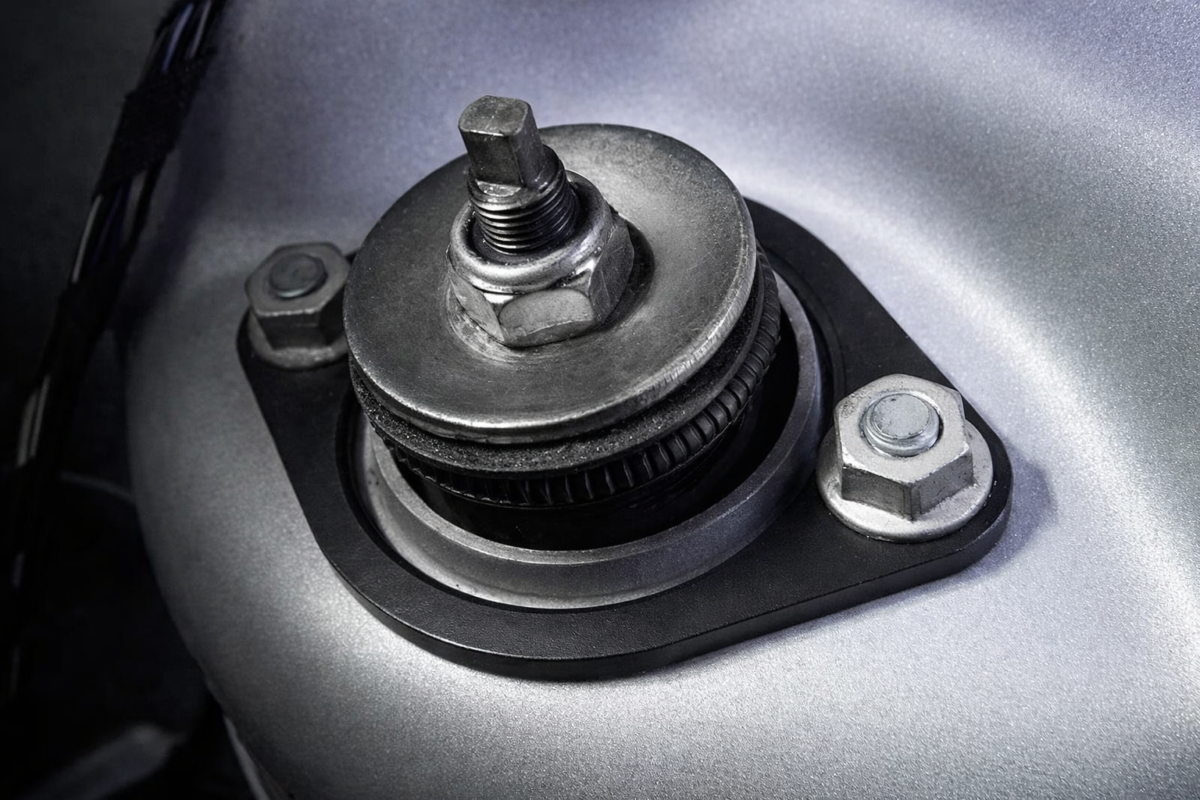
🔹 STEP 4: Preparing the new assembly
- Install the shock absorber on the new shock absorber.
- Lightly grease the polyurethane bushings (required).
- Install successively :
- the little puck,
- the large puck,
- the new, reinforced shock absorber mount.
⚠️ The cupped washer must be oriented to support, convex side.
- Install top nut and tighten according to manufacturer's recommendations.
🔹 STEP 5: Installation of reinforcement plates (if fitted)
- Position the reinforcement plate on shock tower, trunk side.
- Check that the surface is clean and flat.
- Align holes perfectly.
- Fit the shock absorber support through the plate.
- Tighten gradually and crosswise.
👉 The reinforcing plate :
- does not modify the geometry,
- does not stiffen the suspension,
- but structurally strengthens the caisse.
🔹 STEP 6: Final reassembly
- Reposition the shock absorber in the rear arm.
- Refit lower screw and tighten to torque.
- Replace the soundproofing.
- Reclip the carpet and trunk trim.
🔎 Checks after installation
- No perceptible play
- No metallic noise
- Well-centered shock absorber
- Progressive road test recommended
7. Conclusion: understand before modifying
The BMW E30, E36, E46, Z3 and Z4 are extraordinary cars, but they're not the only ones. their age requires a more considered approach.
👉 Modify the suspension without reinforcing the chassis,
👉 ignore signs of structural fatigue,
👉 underestimate repair costs,
is to take unnecessary risks.
A smart approach is to :
- understanding weaknesses,
- adapting the chassis to modern requirements,
- prevention rather than repair.