
DRL PCB installation guide
For car enthusiasts looking to improve the look of their vehicle, our yellow DRL LEDs are the ideal solution for radically changing the style of your BMW. This installation guide will guide you through the replacement of your BMW's Daytime Running Light (DRL), giving your car a personalized, modern look. If you'd like to change the color of your BMW's Angel Eyes, don't hesitate to visit our store (MACOTE).
If you have been redirected here by one of our product sheets, this means that this installation is compatible with your BMW. Unfortunately, we don't yet have detailed instructions for all models, but this guide has been designed to give you a thorough understanding of the DRL module changeover process. By following these instructions, you should be able to complete the installation successfully. In any case, you can contact us at any time to help you with the installation process.
Note: This is a general guide. Vehicle designs vary, and some steps may differ depending on the model. Always consult your vehicle manual if in doubt. What's more, our DRLs are designed exclusively for original equipment headlamps and are not suitable for after-market headlamps.
Video presentation of the installation
Installation process
Before starting installation, make sure the ignition is switched off and the battery disconnected to avoid any risk of electric shock or short circuits.
Step 1: Identify and remove the DRL module
Locate the DRL modules, usually mounted on the top or rear of the headlamps. Unscrew the module using a T20 screwdriver. On some vehicles, it may be necessary to remove the bumper, fender or tires for better access.


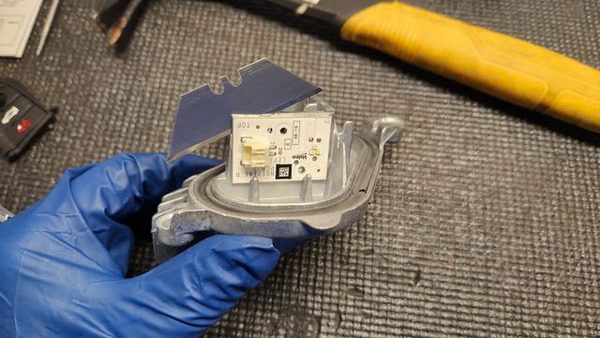
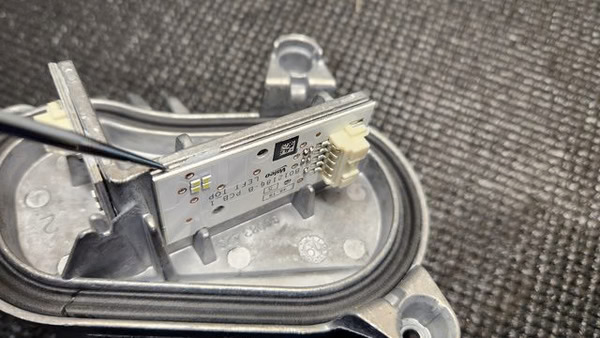
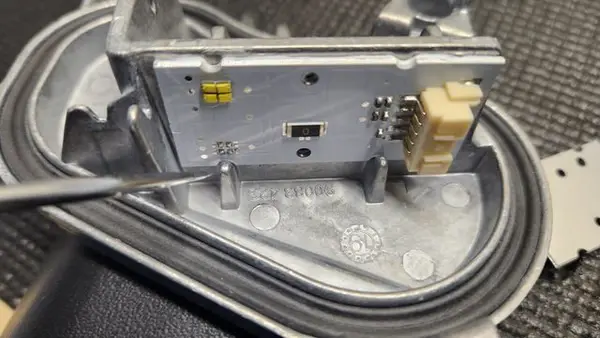
Step 2: Detach the DRL board from the heat sink
Move the module to a suitable workspace. Identify the original thermal paste between the heatsink and the DRL circuit board. Using a cutter blade, carefully separate the LED board from the aluminum. On some models, you can use a thin screwdriver to push the PCB through the holes provided.

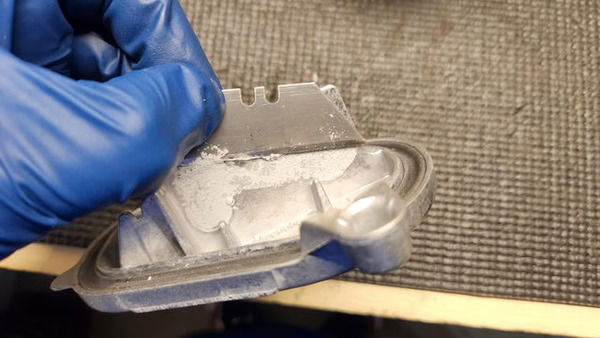
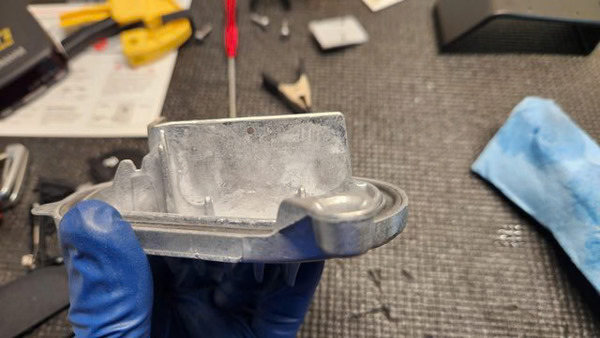
Step 3: Clean the heat sink
Once the board has been removed, use a razor blade to remove any residual thermal glue without damaging the aluminum. Clean the heatsink with isopropyl alcohol to remove any traces of thermal paste.
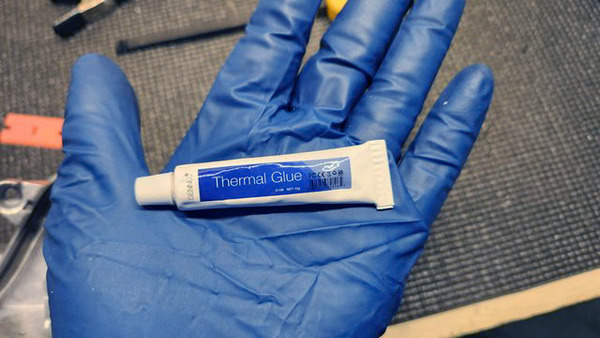
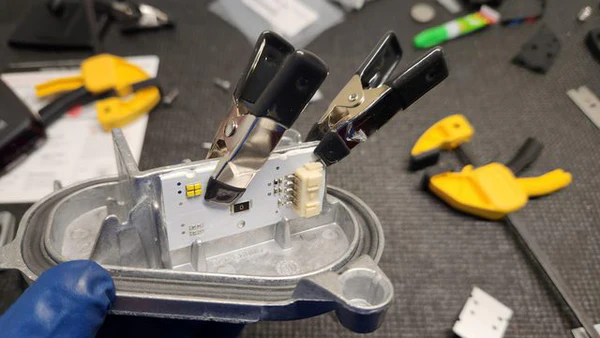
Step 4: Apply the new thermal adhesive and install the new DRL module
Apply a line of thermal paste to the center of the back of the new LED PCB. Position the board on the heatsink, aligning the slots with the tabs. Apply even pressure and hold the board in place with clamps while it dries.

Step 5: Allow thermal adhesive to dry
Wait 1 to 2 hours for complete drying before continuing with installation.
Step 6: Reassemble the DRL modules
Remove the clamps and reconnect the modules to their respective connectors. Replace the module in the headlight housing and secure with Torx T20 screws, but do not overtighten to avoid damaging the plastic housing.
Step 7: Enjoy the final result
Congratulations! Your new DRLs are installed. Admire the transformed visual appearance of your vehicle. Whether you've chosen a single-color or RGB version, your car will have a unique and distinctive touch.
Conclusion
By following these steps, you can customize your vehicle with our DRL modules. This is a general guide and may require adjustments depending on the model of your car. At Macote, we help you transform your BMW.